Table of Contents
ToggleSecurity cameras shouldn’t mean climbing a ladder every few months to swap batteries. That’s where Blink camera solar panels come in, a simple add-on that keeps outdoor cameras charged year-round using nothing but sunlight. For homeowners looking to eliminate maintenance hassles while keeping their property secure, pairing a solar panel with a Blink camera is one of the smartest upgrades available. This guide walks through everything needed to choose, install, and maintain a solar blink camera setup, from compatibility basics to troubleshooting common hiccups. Whether someone’s installing their first outdoor camera or upgrading an existing system, the right solar panel can turn a good security setup into a truly hands-off solution.
Key Takeaways
- A Blink camera solar panel converts sunlight into continuous power for outdoor cameras, eliminating or drastically reducing the need for manual battery swaps and maintenance.
- Blink camera solar panels pay for themselves within 12–18 months while reducing battery waste, improving camera uptime, and supporting remote installations without electrical wiring.
- Compatibility is essential—verify your camera model (Blink Outdoor, Outdoor 4, or XT2) and connector type (micro-USB or USB-C) before purchasing a solar panel.
- Mount the solar panel on a south-facing surface with 3–4 hours of direct sunlight daily, angled perpendicular to the sun’s path and free from shading for maximum efficiency.
- Regular maintenance—including quarterly cleaning, cable protection from wildlife, and seasonal angle adjustments—ensures consistent solar charging performance year-round.
What Is a Blink Camera Solar Panel and How Does It Work?
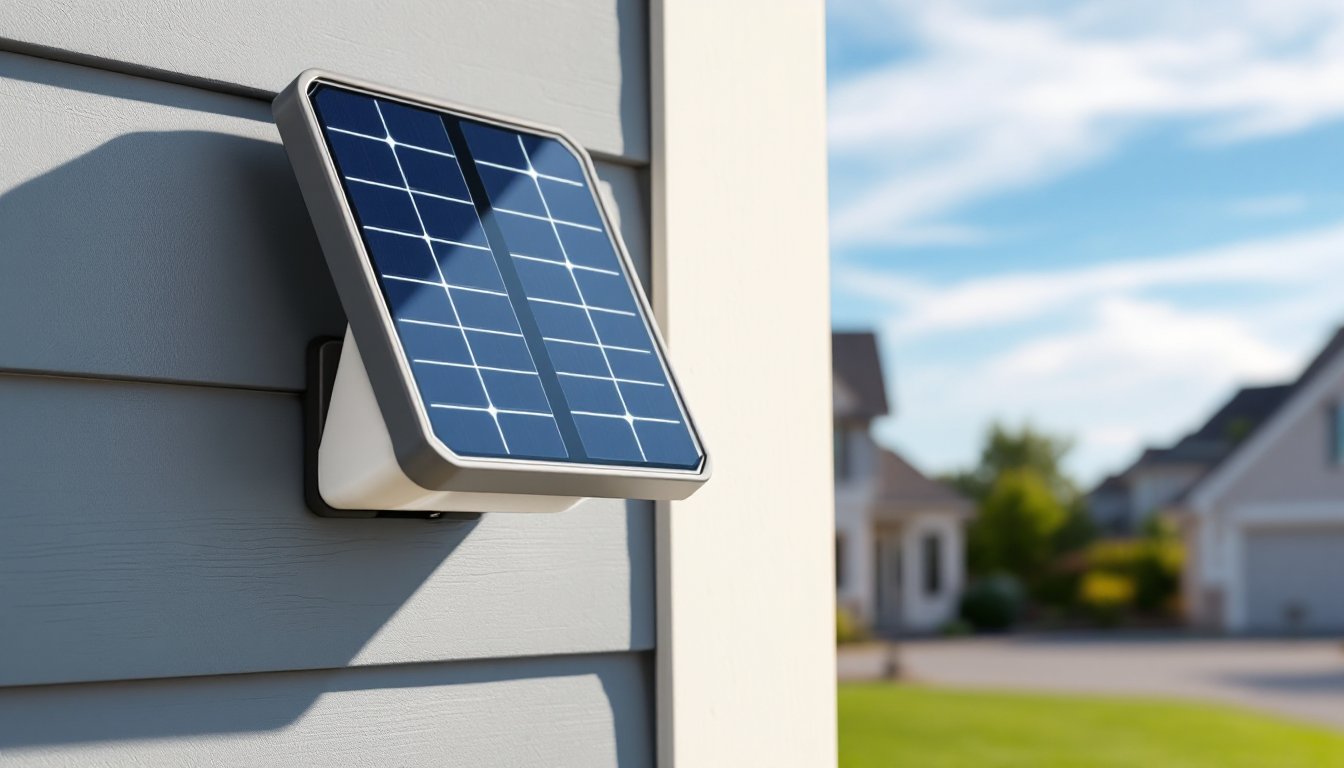
A Blink camera solar panel is a weatherproof charging accessory that connects directly to compatible Blink outdoor cameras via a micro-USB or USB-C cable (depending on the camera model). The panel converts sunlight into electrical current, continuously topping off the camera’s internal rechargeable battery pack, eliminating or drastically reducing the need for manual battery swaps.
The tech behind it is straightforward: a monocrystalline or polycrystalline photovoltaic cell captures solar energy, which passes through a voltage regulator to ensure safe, consistent charging at the camera’s required input (typically 5V). Most panels include a 6.5-to-10-foot cable, allowing flexible positioning, the panel can face south while the camera covers the driveway or porch.
Blink’s official solar panel mount is designed for the Blink Outdoor and Blink Outdoor 4 models. Third-party options also exist, but compatibility varies. The system doesn’t store excess energy: it charges in real-time during daylight and relies on the camera’s internal battery overnight or during cloudy stretches.
Understanding this setup is key: the panel doesn’t replace the battery, it extends its life indefinitely under the right conditions. In climates with at least 3-4 hours of direct sunlight daily, many users report never needing to recharge or replace batteries manually.
Key Benefits of Using Solar Panels with Your Blink Cameras
The biggest draw is maintenance-free operation. Instead of pulling cameras down every two to four months to swap AA lithium batteries (or recharge battery packs), the panel does the work automatically. For cameras mounted high under eaves or at the edge of a property, that’s a serious convenience gain.
Cost savings add up over time. A two-pack of lithium AA batteries runs $8-$12, and a heavily-used camera might need fresh cells three times a year. A solar panel pays for itself within 12-18 months, then continues delivering free power for years. For multi-camera setups, the savings compound quickly.
Environmental impact is another consideration. Disposable batteries contribute to landfill waste and require mining and processing. Solar charging eliminates that cycle entirely, making it a cleaner option for eco-conscious homeowners.
Improved uptime is a practical benefit often overlooked. Battery-powered cameras can go offline without warning if someone forgets to check charge levels. With solar, the camera stays powered as long as it gets daylight, reducing the risk of gaps in coverage during critical moments.
Finally, solar panels support remote or hard-to-reach installations. Mounting a camera at a gate, barn, or detached garage often means less frequent visits. Solar power makes those distant placements viable without adding electrical wiring or scheduling regular battery runs.
Choosing the Right Solar Panel for Your Blink Camera Model
Compatibility is non-negotiable. Blink’s official solar panel works with the Blink Outdoor, Blink Outdoor 4, and XT2 models. The original Blink XT and indoor-only models don’t support solar charging due to different power inputs and weather ratings. Always verify the camera model before purchasing any panel.
Connector type matters. Older Blink Outdoor cameras use a micro-USB charging port, while the newer Outdoor 4 switched to USB-C. Some third-party panels include adapters: others don’t. Check what’s in the box to avoid needing a separate cable.
Panel wattage and size affect charging speed and mounting options. Blink’s official panel outputs roughly 2.5W and measures about 5 x 7 inches, compact enough for discreet mounting but large enough to keep up with moderate camera activity. Third-party panels range from 2W to 5W: higher wattage helps in partly shaded locations or high-traffic areas where the camera records frequently.
Cable length is a hidden constraint. The standard 10-foot cable gives decent flexibility, but if the best sun exposure is farther from the ideal camera angle, an extension may be necessary. Some aftermarket kits include 16-foot cables, which are worth the extra cost for tricky installs.
Weather resistance should match the camera’s IP rating. Blink Outdoor cameras are rated IP65 (dust-tight, resistant to water jets). The solar panel should meet or exceed that standard to survive heavy rain, snow, and temperature swings. Look for panels with sealed junction boxes and UV-resistant coatings.
Step-by-Step Installation Guide for Blink Solar Panels
Tools and materials needed:
- Solar panel kit (with mount, cable, and hardware)
- Drill/driver with appropriate bits (masonry, wood, or metal depending on surface)
- #8 or #10 screws (typically included, but verify length for your siding)
- Level (a small torpedo level works fine)
- Pencil for marking pilot holes
- Safety glasses (especially for masonry or overhead drilling)
Step 1: Plan camera and panel placement. Mount the camera first if it’s not already installed. Identify a nearby location for the panel that gets unobstructed sunlight from roughly 9 a.m. to 3 p.m., this window captures peak solar hours. South-facing placement works best in the Northern Hemisphere: adjust for local shading from trees, roof overhangs, or neighboring structures.
Step 2: Attach the mounting bracket. Hold the panel’s bracket against the wall, fence post, or eave and use a level to ensure it’s plumb. Mark the screw holes with a pencil. For wood siding or trim, drill pilot holes slightly smaller than the screw diameter to prevent splitting. For brick, stucco, or concrete, use a masonry bit and insert wall anchors before driving screws. For vinyl siding, avoid over-tightening, snug is enough: crushing the siding causes cracks.
Step 3: Secure the panel to the bracket. Most mounts use a ball-joint or tilt mechanism that lets the panel angle toward the sun. Tighten the adjustment knob once the panel is positioned, don’t leave it loose or wind will shift it over time.
Step 4: Route and connect the cable. Run the cable from the panel to the camera, keeping it along edges or tucking it under trim to avoid a dangling appearance. Use cable clips or outdoor-rated staples every 12-18 inches to secure it. Plug the micro-USB or USB-C end into the camera’s charging port until it clicks. The camera’s LED should blink or display a charging indicator (check the Blink app for confirmation).
Step 5: Test the setup. Monitor the camera’s battery level in the Blink app over the next few days. On sunny days, the battery should hold steady or climb slightly. If it drains, revisit panel angle and shading.
Mounting and Positioning for Maximum Sun Exposure
Angle the panel perpendicular to the sun’s path at solar noon, this varies by latitude. A general rule: in the continental U.S., tilt the panel at an angle equal to your latitude (e.g., 35° in Atlanta, 40° in Denver). Many mounts offer 30° to 60° of tilt adjustment.
Avoid common shading mistakes: morning shadows from a fence might seem minor, but even partial shade can cut output by 50% or more. Use a smartphone app like Sun Seeker to visualize the sun’s arc across seasons, a spot that’s sunny in June might be shaded in December when the sun sits lower.
If mounting on a post or pole, ensure it’s plumb and stable. A leaning post changes the panel’s effective angle and can make seasonal adjustments harder. For metal surfaces (like a shed or gate), use self-tapping screws rated for outdoor use and apply a dab of silicone sealant around holes to prevent rust.
Troubleshooting Common Solar Panel Issues
Battery still draining even though solar panel: First, check the cable connection, micro-USB plugs can work loose from vibration or temperature cycling. Unplug and reconnect firmly. Next, verify the panel isn’t shaded for large parts of the day. Even dappled shade from tree branches reduces output significantly. If the camera records dozens of clips daily or streams live video frequently, the panel may not generate enough power to keep up: consider reducing motion sensitivity or clip length in the app settings.
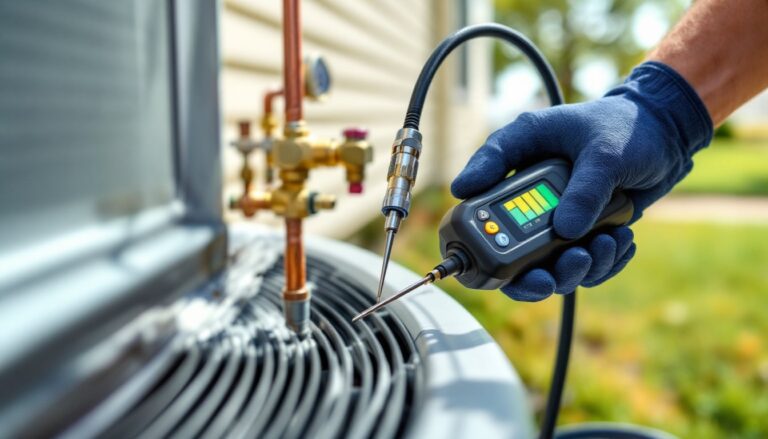
Camera shows no charging activity: Inspect the cable for damage, rodents, lawn equipment, and UV exposure can all cause breaks. If the cable looks intact, test the panel’s output with a multimeter set to DC voltage. In direct sunlight, it should read close to 5V-6V. If it’s significantly lower, the panel may be defective. Also confirm the camera firmware is up to date: older firmware versions sometimes had bugs affecting solar charging recognition.
Panel or cable overheating: Solar panels get warm in direct sun, but the cable shouldn’t feel hot to the touch. Overheating usually indicates a short circuit or damaged insulation. Disconnect immediately and inspect for pinched or frayed wires. Replace the cable if necessary, using a damaged cable risks damaging the camera’s charging circuit.
Inconsistent charging in winter: Shorter days and lower sun angles reduce solar input. If the camera’s in a northern climate with heavy cloud cover from November to February, the panel may only partially offset battery drain. Adding a second panel (if the camera supports it via a Y-cable adapter) or temporarily supplementing with a manual recharge can bridge the gap.
Mounting hardware loosening over time: Thermal expansion and contraction, plus wind load, can back screws out of wood or strip anchors in masonry. Check mounts twice a year and re-tighten as needed. For chronic issues, upgrade to stainless steel screws and toggle bolts (for hollow walls) or sleeve anchors (for concrete).
Maximizing Performance: Maintenance Tips and Best Practices
Clean the panel every 3-6 months. Dust, pollen, bird droppings, and tree sap all reduce light transmission. Use a soft cloth or sponge with plain water, avoid abrasive cleaners or scrub pads that can scratch the protective coating. For stubborn grime, a drop of dish soap works: rinse thoroughly. In areas with heavy pollen or dust storms, quarterly cleaning may be necessary.
Trim back vegetation as it grows. A branch that barely brushed the panel in spring can cast a full shadow by summer. Keep a 3-foot clearance around the panel if possible. If trimming isn’t an option, repositioning the panel or camera might be easier than constant pruning.
Monitor battery health in the app. Blink’s app displays battery percentage and charging status. If the battery degrades (common after 2-3 years of heavy use), even a perfect solar setup won’t maintain a full charge. Replacing the camera’s internal battery pack or the entire unit may be needed, solar panels can’t reverse lithium-ion aging.
Adjust panel angle seasonally if the mount allows. The sun’s angle changes by roughly 45° between summer and winter solstices. A panel optimized for June might underperform in December unless tilted. Some users mark optimal summer and winter positions on the mount for quick adjustments.
Protect cables from wildlife and weather. Squirrels and rats have been known to chew through outdoor wiring. Running cable through split loom tubing or conduit adds a layer of defense. Where cables cross high-traffic areas (like a walkway), secure them overhead or bury them in a shallow channel to prevent tripping hazards and mower damage.
Many solar-powered security cameras now offer integrated batteries and panels, but retrofitting existing Blink cameras with separate panels remains a cost-effective route. The Blink Outdoor camera pairs well with its official solar accessory, though reviews of the Blink Outdoor camera note that real-world solar performance depends heavily on local climate and camera activity levels.
Consider backup power options for critical coverage areas. If a camera monitors a high-value location (like a safe, vehicle, or entry point), keeping a spare set of lithium batteries on hand provides a fallback during extended cloudy periods or panel failures. Solar is reliable, but it’s not invincible, plan accordingly.
Finally, document the install. Take photos of cable routes, screw locations, and panel angles. If something fails a year later or a new homeowner takes over, that reference saves hours of guesswork. Store the install photos and product manuals in the same cloud folder as security footage for easy access.